Monday, January 13, 2014

Scrapbook Paper Frame

I really liked this idea because you could pick a really fun paper that matched your wall color.

Pinterest Version
DIY picture frames: Glue a smaller frame onto a large flat frame and modpodge scrapbook paper or paint.: MAYBE glue to foam board instead

I have light sage green walls so I picked a fun paper with a green and blue pattern with a neutral background.

I started by tracing the frame on paper and cutting it out. I then painted the wood frame with brown acrylic paint.


I used Mod Podge to attach the paper to the frame and I also applied a thin layer over the paper.


On the Pinterest version they used two frames and stacked them. I did not have a small enough frame to stack on top so I used a small photo mat and covered it with another piece of scrapbook paper. The type of paper I chose was two sided and has complementary patterns purposely so you can use them together. Even though I did not have a small interesting frame like the Pinterest version the contrasting paper creates the same effect.
  

Thursday, January 9, 2014

Banana Oatmeal Muffins

I found this recipe on a blog that was posted on Pinterest.

Pinterest Version
Banana Oatmeal Breakfast Muffins


Ingredients
  • 2.5 cups old fashioned oats (or gluten-free)
  • 1 cup plain low fat greek yogurt ( I used banana yogurt because that is what I had in the fridge)
  • 2 eggs 
  • 3/4 cup organic sugar (or sweetener of your choice. If using honey, reduce to 1/2 cup)
  • 1.5 tsp baking powder
  • 1/2 tsp baking soda
  • 2 ripe bananas
  • 1/2 teaspoon vanilla extract
  • 1/2 teaspoon ground cinnamon
Instructions
  • Preheat oven to 400 degrees
  • Grease muffin tins
  • Put all the ingredients into a food processor or blender to mix and make the oats smooth.
  • Pour mix into muffin tin (If I were to do this again I would fill them almost to the top because the muffins were pretty small)
  • Bake for 15-20 mins and test with a toothpick
My Version


They turned out good but I think I would rather stick to oatmeal cookies and banana bread and not combine them next time. 

Wednesday, January 8, 2014

Gold Beaded Hoops

I had first seen these earrings on Etsy but never thought to try making them until I saw them on Pinterest and they were so simple!

Pinterest Version


Supplies


In the Pinterest version the instructions show you how to create the hoops but for a shortcut I skipped this step because I knew I could buy them already made at a craft store.
The hoops I bought are much more sturdy then if you were to hand make them out of wire and they were only 99 cents!

Step by Step
I could not find plain gold hoops the size I wanted with out the little rings on the bottom so I just used my jewelry wire cutters to snip those off.


I purchased a thin jewelry wire similar to the hoop color. I cut about a foot and a half of wire and wrapped one end in the top ring to start it off.

 I then strung a light pink seed bead on the wire and wrapped it very tightly around the hoop. Continue to do this  all the way around the hoop. Remember to keep the wire very taught so that the beads do not roll around. 

The hoop came with jump rings and ear wire hooks. I attached these to the top ring of the gold hoop.


Super Easy and Super Cheap!


Tuesday, January 7, 2014

Stamped Candles

Stamped Candles 

This was such a simple project. These candle could be a great accent in the house or even better a homemade gift that everyone will love!


Pinterest Version
Picture of DIY Printed Candles


My Version

The Products I used


StazOn Ink Pads 
Rubber Stamp w/ Script
Various Sized White Candles 

Instructions:
 I bought different sized candles at the dollar store. I then flipped the stamp so the wooden side was down and the rubber side was on top

I then inked the stamp very well and slowly and with pressure rolled the candle across the stamp. 
If you have a large candle and you may have to roll it a few times across the stamp. In between each time you roll it lightly dry it with a hair dryer on low heat to set the stamp because when I first tried this I had ALOT of smudging. 
(buy extra candles so you can practice)
Make sure the ink is completely dry before you handle.


Monday, January 6, 2014

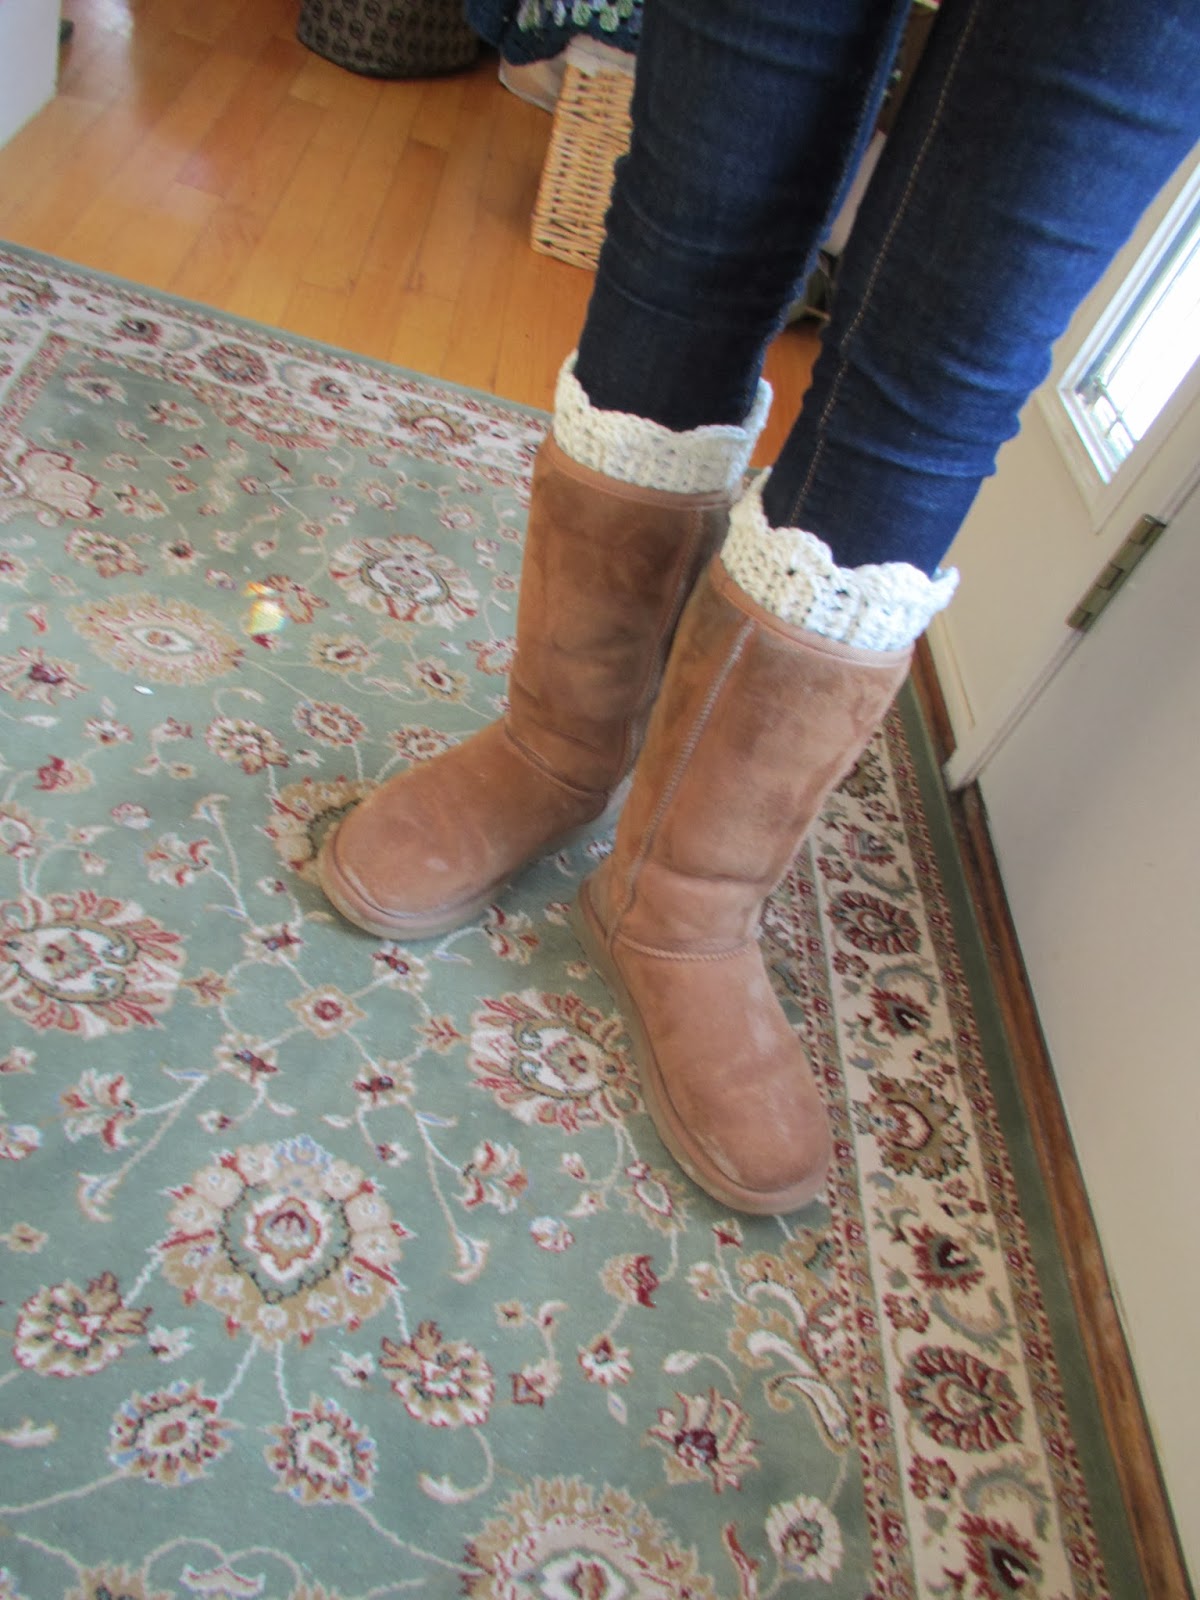
Crochet Boot Cuffs

Everywhere I go this season every women I see has boot on and when I saw this next pin I knew that I had to try to make my own.

CROCHET BOOT CUFFS


Pinterest Version
DIY crochet boot cuffs. Actual Instructions!


I love to crochet but I am not any good at reading patterns so usually what I do is I find something I would like to make and then I search for it on YouTube. They have step by step tutorials that are great!
I found a tutorial I liked but I simplified it.

I used medium weight yarn and a H 5.00MM hook
I chained 16 which will make the height of the cuff


I then single crochet 15 


Chain 2 then turn the work and double crochet 15


I continued this pattern until I had 28 rows which fit around my calf. After trying it on when finished I realized I should have made it a few less rows because the yarn stretched out and it is now a little to big. You want it to fit snug so it doesn't move around. I single crochet the ends of the pieces together then flipped it inside out.
For the scalloped edge you will crochet along the cuff line. There will be 28 openings that were created. There will be a bigger whole created by the double crochet and a smaller whole from the single crochet. I slip stitched into the bigger area the double crochet made then double crochet 5. Skip the next whole and go into the next bigger whole and single crochet. Skip the next whole go into the next big whole and double crochet 5 and continue this pattern until you go all the way around.


My Version


Sophie (my dog) was very interested

I cant wait to try with different colors and types of yarn. If crocheting isn't your thing I have seen them made with lace or by cutting of the cuff of a sweater. 


Sunday, January 5, 2014

Oops

Oops....Missed a day! I will share two posts today to make up for it.

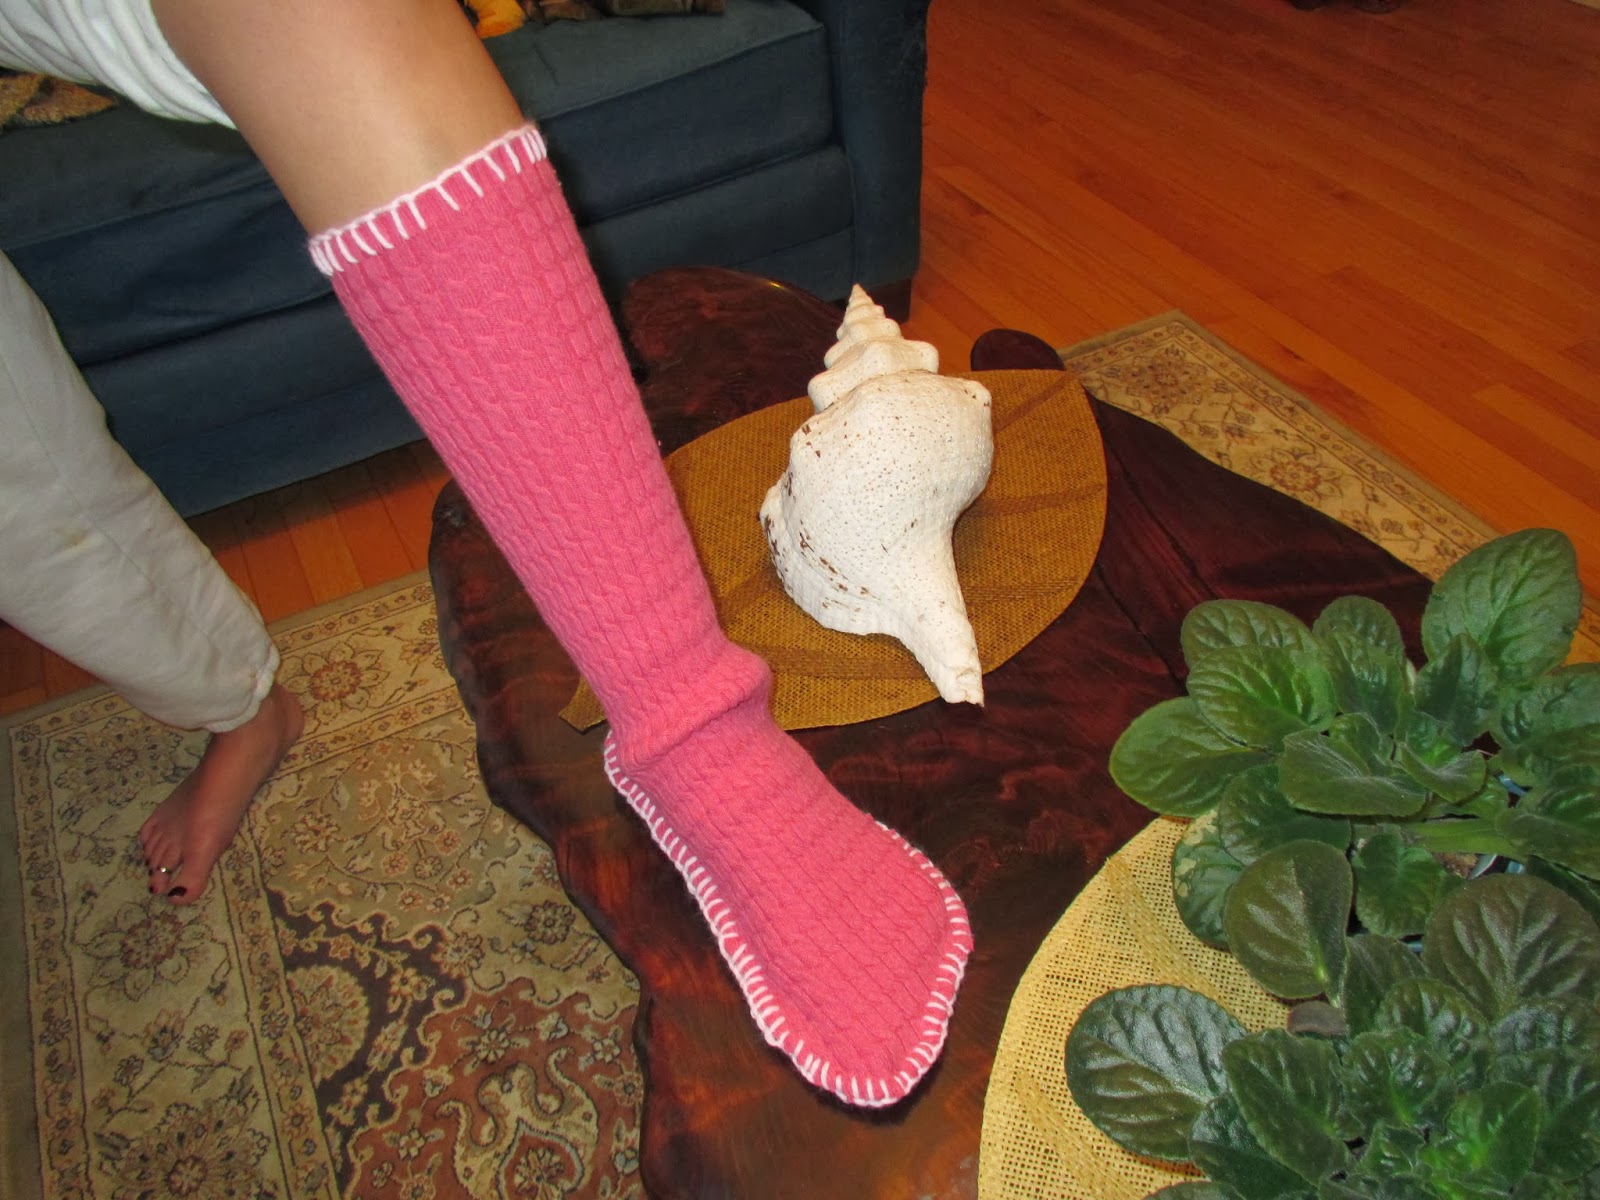
With the left overs of the pink sweater I used to make the gloves, I am going to use to make sweater slippers :)
  
Pinterest Version found on 
upcycled sweater slipper boots 02

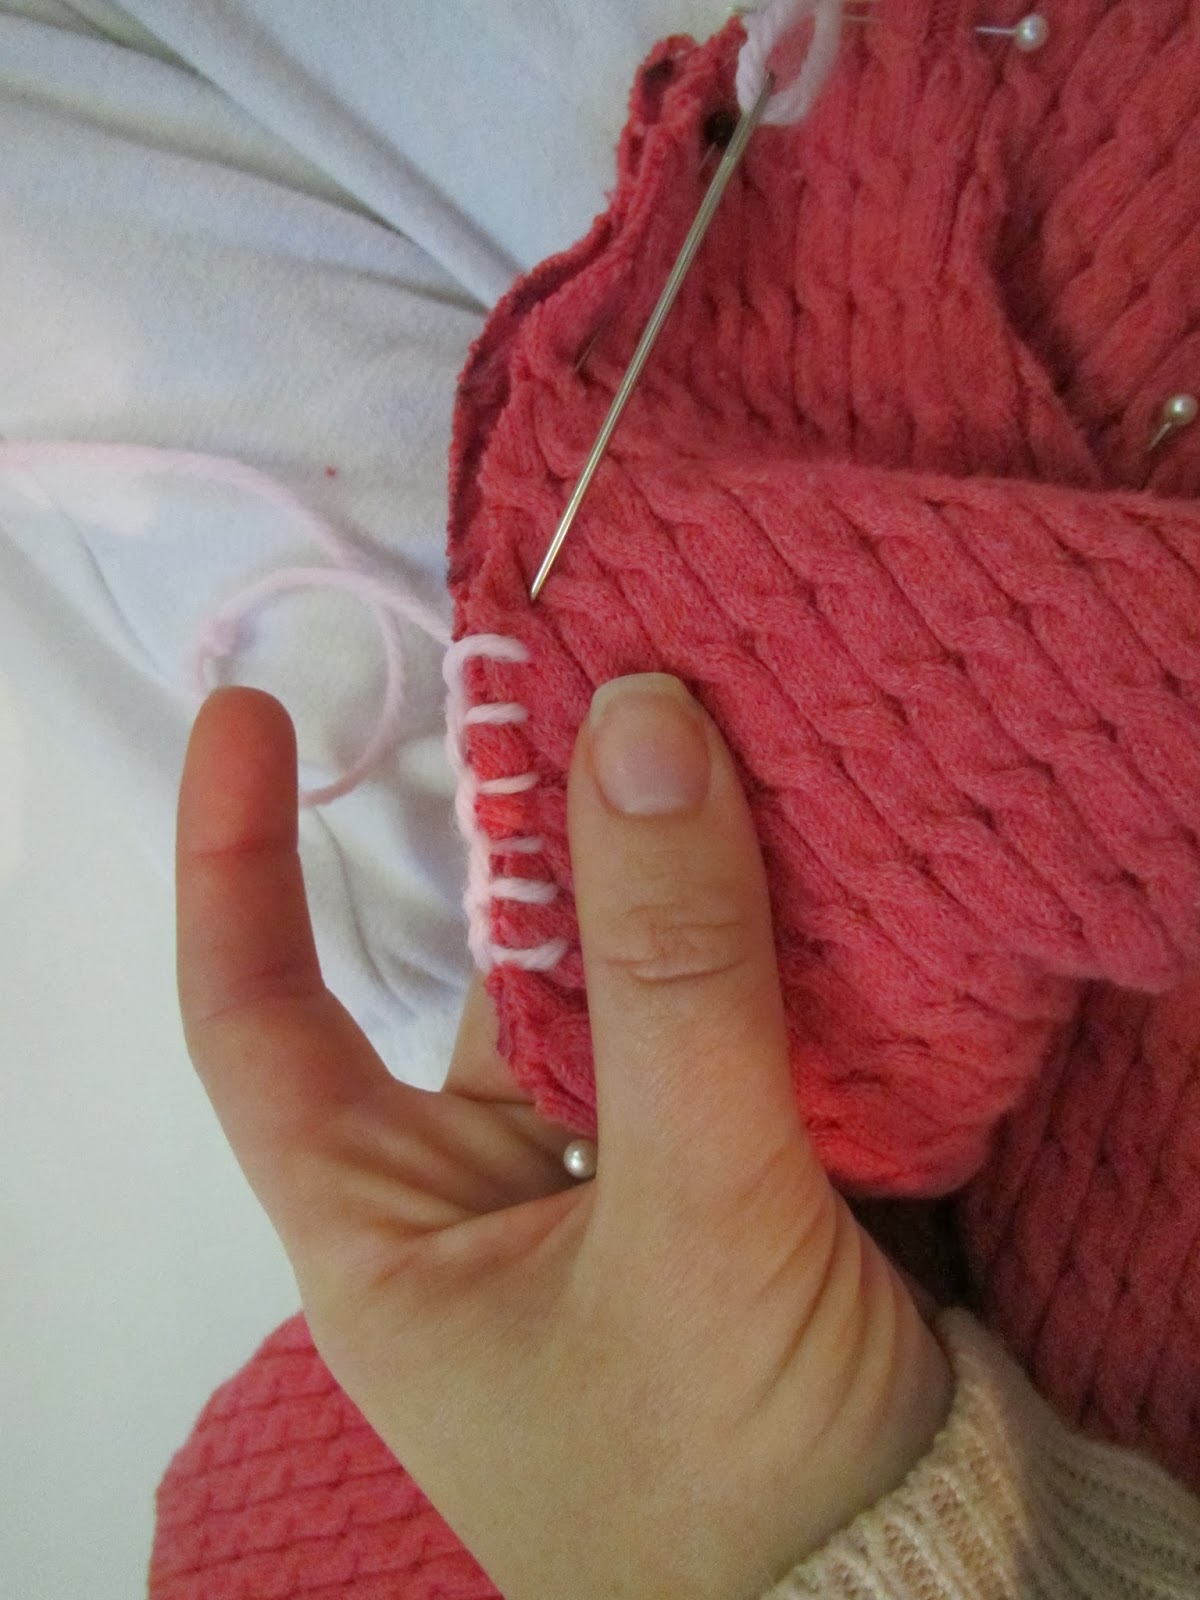
I started with cutting off the sleeves. I then pulled the sleeves over my legs and cut around my feet.

I traced my feet on paper then cut them out and used it as a stencil for the bottom of my slippers.


I pinned the pieces of fabric by stretching and making sure that the edges meet.
I then with yarn, blanket stitched them together and around the top cuff.


I have big feet but these make them look like sasquatch feet hehe :)

For my nextttt pin I am going to share a recipe I actually found awhile ago. 
I have been making and bringing this to parties and it has always been a big hit.

BACON WRAPPED ASPARAGUS 
YUMMMMMM

Pinterest Version
Bacon Wrapped Asparagus      2 lb fresh asparagus, ends trimmed     12 slice bacon, uncooked     1/2 c light brown sugar     1/2 c butter     1 Tbsp soy sauce     1/2 tsp garlic salt     1/4 tsp freshly ground pepper

I worked off this recipe but I have done it both with butter and with out and honestly you do not need it so skip that ingredient. 


 Good as an appetizer, on a salad, or just alone as a meal :)